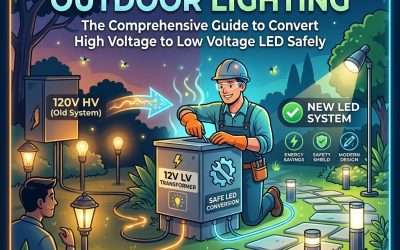
Diagnose and Repair Low Voltage Landscape Lighting – Reliable landscape lighting repair and outdoor lighting maintenance keep your outdoor lighting system protecting the beauty, safety, and security of your property after dark. Because these systems live entirely outdoors, they are constantly subjected to harsh elements. Heavy rain, shifting soil, extreme temperature fluctuations, and even rogue landscaping tools can take a toll on your wires and fixtures over time, making routine outdoor lighting repair and landscape lighting maintenance essential.
When a section of your yard goes dark, the prospect of fixing it can feel intimidating. Many homeowners assume that electrical work is too dangerous or complex to handle themselves, leading to expensive service calls for incredibly simple fixes. Fortunately, low-voltage systems run on a safe 12V to 15V current, making them highly accessible for DIY troubleshooting.
This comprehensive guide will walk you through the exact protocols our professional technicians use in the field. By following these step-by-step instructions, you will learn how to isolate electrical faults, fix broken wires, restore dead fixtures, and bring your beautiful landscape back to life.
1. Anatomy of an Outdoor Lighting System
Before you can fix a problem, you need to understand how the components of your system work together. A standard low-voltage setup consists of three primary elements:
- The Transformer: This is the heart of your system. It plugs into a standard 120-volt GFCI exterior outlet and steps that dangerous high voltage down to a safe 12-volt to 15-volt alternating current (AC).
- The Underground Wiring: Thick, direct-burial copper cables (usually 12 AWG or 10 AWG) carry the low-voltage current from the transformer out into the yard. These cables are typically buried just a few inches below the topsoil or mulch.
- The Fixtures and Lamps: The spotlights, path lights, and wall washes that actually produce the light. Modern systems use LED lamps that draw very little power, while older systems use power-hungry halogen bulbs.
When an issue arises, the fault always lies within one of these three zones. Our diagnostic process is simply a process of elimination.
2. Essential Tools to Diagnose and Repair Low Voltage Landscape Lighting

To accurately troubleshoot your system, you cannot rely on guesswork. You need a few specific tools to “see” the electricity flowing through your wires. Gathering these items before you begin will save you hours of frustration.
- Digital Multimeter: This is the most important tool in your arsenal. You need a multimeter capable of measuring AC Voltage (to test the power output) and Ohms/Continuity (to test for broken or shorted wires).
- Wire Strippers and Cutters: Essential for cleanly cutting out damaged sections of wire and exposing fresh copper for new connections.
- Gel-Filled Waterproof Wire Nuts: Standard indoor wire nuts will fail underground. You must use silicone-filled connectors to keep moisture out of your splices.
- Trowel or Small Shovel: For gently exposing buried wire runs and junction points without accidentally cutting the cables.
- Dielectric Grease: A silicone-based compound used to seal lightbulb sockets and prevent corrosion.
3. Safety First: Preparing for Electrical Troubleshooting
While the landscape wires buried in your yard carry a harmless 12 volts, the transformer itself is plugged into a highly dangerous 120-volt outlet. Safety must always be your first priority.
Never open a 120-volt outlet cover or hardwired high-voltage junction box unless you have turned off the main circuit breaker at your home’s primary electrical panel. When working near the transformer, ensure the surrounding ground is dry. If you are dealing with exposed copper wires in the yard, simply unplug the transformer from the wall outlet before making any cuts or splices. This ensures the entire low-voltage grid is completely dead while you work.
4. Step-by-Step Transformer Diagnostics and Reset Procedures
If your entire lighting system fails to turn on, the problem is almost always located at the power source. Follow this sequential diagnostic checklist:
- Check the GFCI Outlet: Your transformer should be plugged into a Ground Fault Circuit Interrupter (GFCI) outlet. If moisture trips this safety mechanism, the outlet cuts the power. Press the “Reset” button on the outlet. If it clicks and stays in, check if your lights turn on.
- Test the 120V Input: If the GFCI won’t reset or seems dead, plug a simple device (like a phone charger or a hairdryer) into the outlet. If the device doesn’t turn on, you have a high-voltage issue in your home’s breaker box.
- Inspect the Transformer Breaker: Every professional-grade transformer has a built-in toggle switch or push-button circuit breaker. If the transformer detects a short circuit in the yard, it trips this breaker to protect itself. Flip it back to the “On” position. If it immediately trips again, you have a direct short circuit in the yard (which we will cover in section six).
- Test the Output Lugs: If the outlet works and the transformer breaker is on, use your multimeter. Set the dial to “AC Volts.” Touch one probe to the “Common” terminal and the other to the “12V” or “15V” terminal block inside the transformer. If the meter reads zero volts, the internal core of your transformer has failed and the unit must be replaced.
5. Identifying and Fixing Voltage Drop Issues
One of the most common complaints homeowners have is that the lights closest to the transformer are nice and bright, but the lights at the far end of the yard are incredibly dim or flickering. This is caused by voltage drop.
As electricity travels down a copper wire, it encounters natural resistance. The longer the wire run, and the more wattage you pull through it, the more the voltage drops. If a 12V current drops down to 9V by the time it reaches the last fixture, the LED bulb won’t have enough power to ignite properly.
How to Fix Voltage Drop:
- Change the Transformer Tap: If your transformer has multi-tap outputs (e.g., 12V, 13V, 14V, 15V), move the main wire for the dim run from the 12V lug to the 14V lug. This pushes a higher initial voltage down the line, ensuring the final fixture receives at least 10V to 11V.
- Split the Run: If boosting the voltage doesn’t work, the wire is simply overloaded. You will need to dig up the middle of the wire run, cut it, and run a fresh “home run” wire from that middle point directly back to the transformer, effectively splitting the load in half.
- Upgrade to LEDs: If you are still using 20-watt or 35-watt halogen bulbs, immediately swap them for 3-watt or 4-watt LED drop-in replacements. Lowering the total wattage on the wire instantly cures most voltage drop problems.
6. Testing for Continuity and Short Circuits Underground
If your transformer’s internal breaker trips the second you turn it on, or if a fuse instantly blows, you have a short circuit. A short occurs when the two copper wires inside your main cable touch each other, creating an infinite loop of electricity that forces the system to shut down. This usually happens when a shovel cleanly slices a wire, or when a landscape edger crushes the cable.
The Continuity Test:
- Unplug the transformer to completely kill the power.
- Disconnect the two main wire leads for the suspected bad run from the transformer’s terminal blocks.
- Set your digital multimeter to the “Ohms” or “Continuity” setting (the icon looks like a soundwave).
- Touch one probe to the first copper wire, and the second probe to the other wire.
- If the multimeter beeps loudly or shows a reading close to zero, you have confirmed a direct short circuit in the yard.
Locating the Short: Finding the exact location of the cut requires visual inspection. Walk the path of the wire and look for freshly disturbed soil, new plant installations, or places where the lawnmower might have scalped the dirt. Once you find the severed or crushed wire, you must splice it back together.
7. The Right Way to Splice and Waterproof Underground Wires
The number one cause of flickering lights and dead fixture runs is poorly executed underground splices. Many people simply twist the wires together and wrap them in black electrical tape. This is a guaranteed recipe for failure. Soil moisture will immediately seep into the tape, oxidizing the copper until it turns green, brittle, and incapable of conducting electricity.
To create a permanent, weatherproof repair, you must use direct-burial splicing materials.
The Professional Splicing Method:
- Strip: Use your wire strippers to cut away the damaged section of the cable. Strip back about 3/4 inch of the thick black insulation on both sides to expose shiny, clean copper.
- Twist & Crimp: Twist the corresponding sides of the wire tightly together. For maximum security, use a mechanical copper crimp sleeve and a crimping tool to bind the wires permanently. Alternatively, you can use a high-quality silicone-filled wire nut.
- Seal: Insert the mechanical connection into a heavy-duty, gel-filled waterproofing tube. If using heat-shrink tubing, slide the adhesive-lined tube over the connection and use a heat gun to shrink it down until the internal glue melts and flows out of the edges, creating an airtight seal.
8. Common Fixture Failures: Sockets, Bulbs, and Seals
If the rest of the system is working perfectly but one single light is dead, the problem is localized to that specific fixture.
First, check the physical connection where the fixture’s wire taps into the main underground cable. Cheap “pierce-point” connectors are notorious for wiggling loose or corroding over time. If the connector looks suspicious, cut it out and hard-splice the fixture directly into the main line using the waterproof method described in section seven.
If the connection is solid, inspect the fixture housing. Open the glass lens and look inside.
- Water Intrusion: If there is standing water or heavy condensation inside, the rubber O-ring seal has failed. The water will short out the bulb. Clean the inside, dry it thoroughly, replace the bulb, and lubricate the new O-ring with a tiny amount of dielectric grease before closing it.
- Corroded Sockets: Remove the bulb and look at the bi-pin socket holes. If they are filled with white, crusty mineral buildup, the socket can no longer transmit electricity. You can attempt to clean it with a small wire brush and contact cleaner, but heavily corroded sockets usually mean the entire fixture needs to be replaced.
9. Advanced Strategies to Diagnose and Repair Low Voltage Landscape Lighting
For complex layouts featuring dozens of fixtures or multiple wire runs, professional technicians rely on advanced load testing to prevent future failures before they happen.
Using a Clamp-On Ammeter: A clamp meter allows you to measure exactly how much electrical current is flowing through a wire without having to cut it. By clamping the meter around a single wire coming out of the transformer, you can read the total amperage draw of that specific run.
Calculating the System Load: To ensure your system operates safely, the total wattage drawn by your lights should never exceed 80% of the transformer’s maximum capacity. For example, if you have a 300-watt transformer, your maximum safe load is 240 watts. If your clamp meter reads that a wire run is pulling 18 Amps at 12 Volts (18A x 12V = 216 Watts), you know the system is running safely within its operational limits. If the amperage is too high, the internal wiring of the transformer will overheat, significantly reducing its lifespan.
10. Executing Routine Maintenance and Upgrades
The best way to fix lighting issues is to prevent them from happening in the first place. Establish a simple bi-annual maintenance routine to protect your investment.
Every spring and fall, walk your property during the day. Dig down gently around your main wire hubs to ensure the splices haven’t been pulled apart by tree roots. Wipe down the glass lenses of your fixtures with a microfiber cloth to remove hard water stains and dirt, which can block up to 30% of your lumen output. Finally, trim back fast-growing shrubs and ground cover that may be physically bending your path lights or blocking your carefully placed uplighting beam angles.
By understanding the anatomy of your system, investing in a good multimeter, and mastering the art of the waterproof splice, you can easily maintain a flawless, reliable outdoor lighting system that operates beautifully night after night.